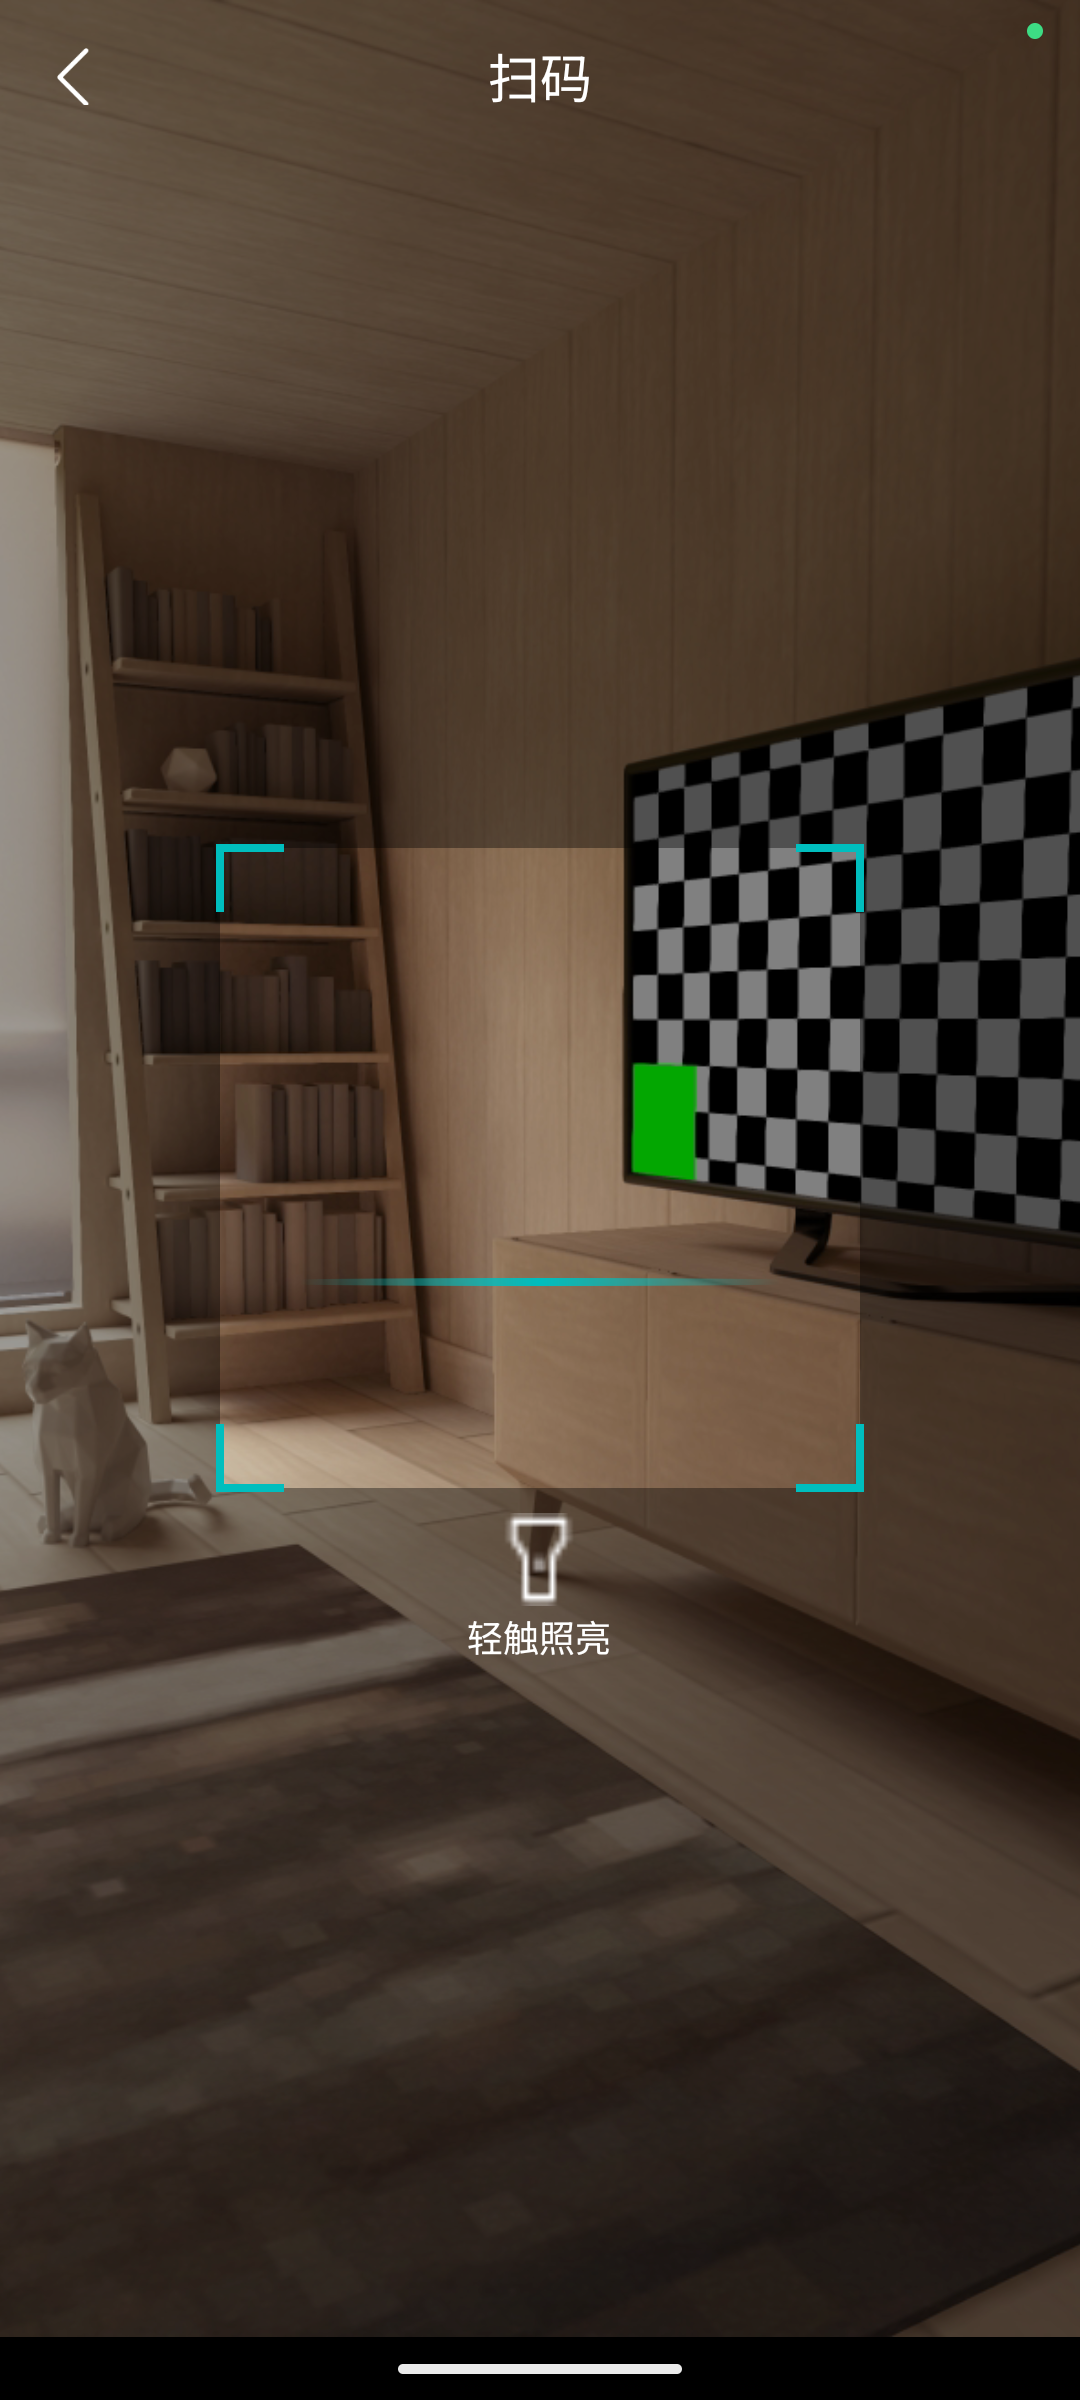
在uni-app的Api文档中显示,uni.scanCode扫码方法在H5端是不支持的,所以我们需要自己开发一个扫码组件。
下面是扫码组件相关代码
vue
<template>
  <view></view>
</template>
js
let barcode = null
let backVew = null
let content = null
let scanBarVew = null
const origin = window.location.origin
export default {
  data() {
    return {
      flash: false, //是否打开摄像头
    }
  },
  onLoad() {
    const currentWebview = plus.webview.currentWebview() // 获取当前webview
    plus.navigator.setFullscreen(true) // 设置全屏模式
    this.createBarcode(currentWebview) // 创建二维码扫描窗口
    this.createView(currentWebview) // 创建操作按钮及提示界面
  },
  methods: {
    /**
     * 扫码成功回调
     * @param {Number} type - 扫码类型
     * @param {String} result - 扫描结果
     */
    onmarked(type, result) {
      let typeName = 'unknown'
      switch (type) {
        case plus.barcode.QR:
          typeName = 'QR'
          break
        case plus.barcode.EAN13:
          typeName = 'EAN13'
          break
        case plus.barcode.CODE39:
          typeName = 'CODE39'
          break
        case plus.barcode.CODE128:
          typeName = 'CODE128'
          break
      }
      uni.navigateBack({
        delta: 1
      })
      console.log('onmarked:', {
        type: typeName,
        result
      })
      this.handleBackPress()
    },
    // 创建二维码扫描窗口
    createBarcode(currentWebview) {
      barcode = plus.barcode.create(
        'barcode', // 二维码扫描窗口ID
        [
          plus.barcode.QR,
          plus.barcode.EAN13,
          plus.barcode.CODE39,
          plus.barcode.CODE128
        ], // 支持的条码类型
        {
          top: '0',
          left: '0',
          width: '100%',
          height: '100%',
          scanbarColor: '#00BEBE', // 扫描条颜色
          position: 'static',
          frameColor: '#00BEBE' // 扫描框颜色
        }
      )
      barcode.onmarked = this.onmarked
      barcode.setFlash(this.flash)
      currentWebview.append(barcode)
      barcode.start() // 启动扫码
    },
    // 创建操作按钮及页面内容
    createView(currentWebview) {
      // 创建返回原生按钮
      backVew = new plus.nativeObj.View(
        'backVew',
        {
          top: '0px',
          left: '0px',
          height: '40px',
          width: '100%'
        },
        [
          {
            tag: 'img',
            id: 'backBar',
            src: `${origin}/static/img/backBar.png`,
            position: {
              top: '10px',
              left: '10px',
              width: '40px',
              height: '40px'
            }
          }
        ]
      )
      // 创建手电筒按钮
      scanBarVew = new plus.nativeObj.View(
        'scanBarVew',
        {
          top: '62%',
          left: '40%',
          height: '10%',
          width: '20%'
        },
        [
          {
            tag: 'img',
            id: 'scanBar',
            src: `${origin}/static/img/scanBar.png`,
            position: {
              width: '40%',
              left: '30%',
              top: '28%',
              height: '40%'
            }
          },
          {
            tag: 'font',
            id: 'font',
            text: '轻触照亮',
            textStyles: {
              size: '14px',
              color: '#ffffff'
            },
            position: {
              width: '80%',
              left: '10%',
              top: '32%'
            }
          }
        ]
      )
      // 页面顶部标题
      content = new plus.nativeObj.View(
        'content',
        {
          top: '0px',
          left: '0px',
          height: '100%',
          width: '100%'
        },
        [
          {
            tag: 'font',
            id: 'scanTitle',
            text: '扫码',
            textStyles: {
              size: '20px',
              color: '#ffffff'
            },
            position: {
              top: '10px',
              left: '0px',
              width: '100%',
              height: '40px'
            }
          }
        ]
      )
      let temp = this
      // 拦截点击事件,避免穿透到webview
      backVew.interceptTouchEvent(true)
      scanBarVew.interceptTouchEvent(true)
      // 添加视图到webview
      currentWebview.append(content)
      currentWebview.append(scanBarVew)
      currentWebview.append(backVew)
      // 返回按钮点击事件
      backVew.addEventListener(
        'click',
        function (e) {
          //返回按钮
          uni.navigateBack({
            delta: 1
          })
          temp.handleBackPress()
        },
        false
      )
      // 手电筒按钮点击事件
      scanBarVew.addEventListener(
        'click',
        function (e) {
          temp.flash = !temp.flash // 切换手电筒状态
          scanBarVew.draw([
            {
              tag: 'img',
              id: 'scanBar',
              src: temp.flash ? `${origin}/static/img/scanBar-flash.png` : `${origin}/static/img/scanBar.png`,
              position: {
                width: '40%',
                left: '30%',
                top: '28%',
                height: '40%'
              }
            },
            {
              tag: 'font',
              id: 'font',
              text: '轻触照亮',
              textStyles: {
                size: '14px',
                color: '#ffffff'
              },
              position: {
                width: '80%',
                left: '10%',
                top: '32%'
              }
            }
          ])
          if (barcode) {
            barcode.setFlash(temp.flash) // 更新手电筒状态
          }
        },
        false
      )
    },
    handleBackPress() {
      // 返回时释放扫码页面资源并退出全屏
      if (barcode) {
        barcode.close()
        barcode.cancel()
        barcode = null
      }
      if (backVew) {
        backVew.close()
        backVew = null
      }
      if (scanBarVew) {
        scanBarVew.close()
        scanBarVew = null
      }
      if (content) {
        content.close()
        content = null
      }
      plus.navigator.setFullscreen(false)
    }
  },
  onUnload() {
    this.handleBackPress()
  }
}
将图片放入uniapp项目中的static文件夹下即可
注意
plus相关api只能在真机环境下运行,浏览器环境不支持。
我们可以使用window.plus来判断当前环境是否支持plus。
在pages.json文件中添加路由
json
{
  "path": "pages/scan-code"
}
后续在页面中可以使用uni.navigateTo跳转到扫码页面
js
uni.navigateTo({
  url: '/pages/scan-code',
})